Pages

Showing posts with label Christmas. Show all posts

Wednesday, January 4, 2017

FO: Hexagon Wreath

Happy new year! You know, this post would have been more relevant a couple of weeks ago, but here is a Christmassy project for you.

FO: Hexagon Wreath

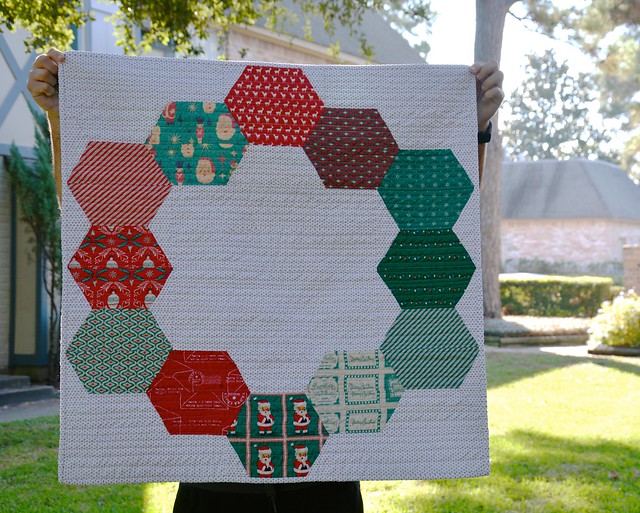
So, I intended to make this before Christmas 2015, but it never happened. I had the fabric picked out and everything. Magically, when I got to cutting in early December, it was pieced within a day or two (amazing!), quilted, bound, and ready to sparkle. I used a Spoonflower Heidi Kenny print, and a bunch of awesome OOP Cosmo Cricket Dear Mrs. Claus prints, plus a nice gold metallic dot for the background.

Decorated

I really love it, and I kind of don't want to take it down. And as you can see, I'm using my Marcelle Medallion as a tree skirt (which the cats have thoroughly enjoyed). I used Jeni's clever Color Hex pattern, and just left off the borders (it makes a pretty generous 45" square as written). I think I'll keep this pattern in mind next time I need a baby gift! Okay, time to take the tree down..

Wednesday, December 24, 2014

For Jessica

Jessica commissioned me to make her some Christmas decorations this year. I was happy to oblige her, and had fun with these projects over the past few months.

There were napkins, each with a red side and a green side.

There's a tree skirt, modified from Modern Handcraft's fun tutorial.

And my favorite, a table runner and placemats. The table runner is made of scrappy strips (some from the napkins, some from stash), and the placemats are all different.

The table runner and placemats are also reversible, with a side that could be used after the holidays are over.

It makes me happy to think that Jessica and her family will be enjoying these decorations for years to come.

I hope you all have a peaceful end of 2014. I'll be back next week to share some goals and end-of-year thoughts!

Tutorials you might like!
Happy Trees Mini Quilt
Gift Tags
Hexagon Tree Skirt
Scrappy Stocking

Thursday, November 1, 2012

HCB: Christmas Plus Pillow Tutorial

This marks the halfway point for the Holiday Craft Bash!

Today, I'm going to share a tutorial for an 18" plus pillow! I recently made one for my friend Rhonda, and decided to make another in reds and greens (and a pop of black!)!

List of materials:

-Sixteen 2.5" strips of different fabrics (at least 15" long; you can use less different fabrics if desired)
-1/2 yard fabric for back
-FQ of light solid (white or off-white) for lining
-20" or 22" zipper
Double-sided fusible tape, similar to Steam-A-Seam 2

Directions:

FRONT

1) Cut 2.5" squares from your strips. Cut five squares from fifteen of the fabrics, and cut six from the last one.
This will give you a total of 81 squares, for a 9 x 9 grid.

2) Find a clean space (this is a job in itself in my sewing room!) that won't be disturbed (by kitties , for instance) and layout your grid.
I like to start in the middle and make one plus, then add additional pluses around it.
You'll need to finish at the outer perimeter, with partial pluses. This takes some time to arrange.
Consider value and color as you do this!
3)Starting with the first row, sew your pieces together with a quarter-inch seam.

I like to sew pairs together, and then blocks.
Be careful not to misplace your pieces!
4)Continue sewing your pieces together, until you have a finished top!
5)Cut an 18.5 x 18.5" piece from your white or off-white solid.
6)With wrong sides together, topstitch (1/8" seam) the edge of the pillow top/white fabric. This is to protect/hide all of those seams!

BACK
6)Cut one 20" x 19" piece from the half yard of fabric, and one 4" x 19" strip from a coordinating fabric (or you can use the same fabric as your 20 x 19" piece).

I'm going to direct you to another tutorial for the pillow back. This is my favorite pillow enclosure, and the tutorial is very well written.

Covered zipper tutorial by Creative Little Daisy

Install your zipper using this tutorial, and then come back! I'll wait.
You should now have a pillow back with a zipper!
7)Finally, with zipper at least halfway open, pin your pillow front and back together (with right sides facing each other).
8)Sew, with 1/2" seam allowance around the perimeter.
Flip inside out, and you're done!

Some HELPFUL TIPS:
*For plus piecing, I prefer to sew my seams open, because it helps me match them better.
*Precise cutting makes for precise piecing!
*I prefer to sew my pieces into blocks, and try to only make one or two long seams. This helps me stay accurate, too. (i.e.-don't sew squares into strips, but "clumps").

As always, make sure you add any finished projects to the Holiday Craft Bash flickr group for a chance at the prizes!

Wednesday, August 8, 2012

I've got a tutorial on Sew, Mama, Sew!

I'm pretty excited to share a tutorial with you today.

Scrappy Festive Table Runner

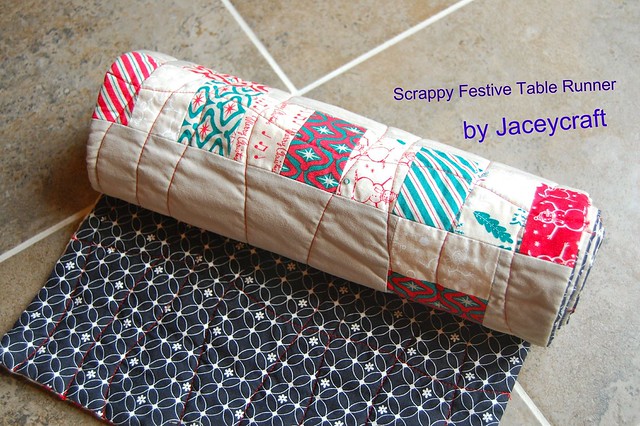
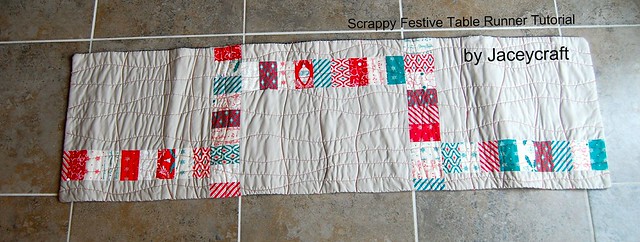
I made this table runner using part of a charm pack of Dear Mr. Claus by Cosmo Cricket and Kona Parchment (which is a great neutral!). You can find the tutorial here on Sew, Mama, Sew!

Tutorial on Sew Mama Sew today!

Since this runner has no binding, it's a fast way to make your home feel festive. I plan to make another for year-round use! It's a scrap friendly pattern, too, in case you're not the charm pack type.

If you try the tutorial, I'd love to see your version! I hope you like it!

Related Posts with Thumbnails