Pages

Friday, March 30, 2012

Friday Favorites (the one with Bokeh the cat)

Friday Favorites

Some recent faves from some talented peeps! 1. Coming Home..., 2. gather here sampler, 3. all up in my grill., 4. Bee Happy Circle Quilt Top, 5. my lunchtime companion, 6. San Bruno Quilt, 7. day 166, 8. Stash basket, 9. green sea turtle

And because it's Friday, a happy video that my sister shared with me recently. Stupid, but it makes me smile.
I'm warning you. It's really silly.

Thursday, March 29, 2012

Improv chevrons and what followed

I have to confess, I don't always love bee block assignments. Occasionally, I'll drag my feet across the finish line, because I'm not in love with the block choice or color scheme. I always finish, and I usually learn something from the process (or even grow to love it!).

This month, in the Love circle of do.Good Stitches, though, well, I am smitten.
There was no dragging of feet, no grumbling.
Only love.

Natalie asked us to follow a tutorial for improv chevrons, found at Six White Horses.

My first block took a little while (mostly because I didn't read the directions carefully enough), but then it all clicked.

Improv Chevron #1

One block done. I was so impressed! It's such a fun block, and it looks a lot more difficult than it is.

Finished improv chevron blocks

I finished the second block this weekend. I love them, and honestly didn't want to send them off to Natalie, but I did.

It's okay, though. I'm playing with the leftovers, as well as adding in other fabrics to make something. Just because.

Improv chevron and others
First improv blocks to the left and right

It is so freeing to make something with no purpose.
As soon as I finished four improv blocks, my brain said, "okay, this will be a mini."
But, my heart said, "keep going". And so, I did.

In progress

I don't know exactly how it will all come together, but it will be fun, and full-size.

More. More. MORE!

I've got a plate full of things to do, but I'm enjoying a little selfish crafting.

Tuesday, March 27, 2012

Gifts from HMQG

How was your weekend? Some of my favorite girls took me out for sushi and karaoke. We belted out some eighties tunes, and had a blast!

I wanted to share with you the surprise gifts I received at last week's guild meeting.

Surprise doesn't even begin to describe it! I've only been a member for a few months, and I was touched by the generosity and thought that these ladies put into gifts for our wedding.

You know I love to cook, right?
The girls made things that we can use in the kitchen!

From HMQG March 2012

Chi made me this reversible apron (also, my face is another confirmation of silliness).

Apron from Chi

Here's the other side. I can't pick a favorite!

Dishtowels and Napkins from Amy!

Amy made me these napkins and dishtowels, and also included some yellow bowls and mugs!

Table runner/trivet from Pam

Pam made me this table runner; she included Insul-Brite, so it's a functional trivet!

Potholders from Mona

Mona made me these adorable potholders, one granny square and one argyle.

Seriously adorable

I love the back of this one; she thought my wedding colors sounded like a weather forecast. It's so fun!

And finally, Robin drew my scraps in our guild swap.
In January, members brought in a bag of scraps to swap with another member (blindly). We then had two months to sew up the scraps into an item for that member.

Received: HMQG Scrap Swap

Robin made me this dishtowel and potholder. I love them!

I drew Beth's scraps, and I made her this tote bag.

FO: Beth's Scrappy Tote

I must admit, Beth's scraps didn't really grab me, but I added the scribble print and the blue solid. I really like this bag now!

I've got some bee blocks and improv to share soon!

Friday, March 23, 2012

Deep breath

My little Bellacat

If you're missing an email or comment response from me, I'm sorry to keep you waiting! I'm covered up in work and wedding things, but I hope to back in this space (and caught up on emails) very soon. I hope you are all having a nice Friday, and I wish you a happy weekend. I'll be bachelorette-ing this weekend. Woo!

Monday, March 19, 2012

Weekend Progress

After a seriously busy weekend, I am feeling pretty accomplished. Although, at the same time, I feel totally behind. There's a lot of changes going on, and I can barely catch my breath.
But let's not focus on that. As an eternal optimist, I'll just show you the happy progress I've made.

It's happeningFirst off, wedding invitations are in the mail! I ordered these from Ruby Press on etsy. Her shop is closed for updates right now, but I highly recommend her shop. Ruby was responsive and helpful during the proof process, and worked with us to get the invitations just right.

WIPs: Napkins

In other wedding news, I (and now my mom is helping!) am making napkins for each guest. This is the first batch. I'm really happy with how they're turning out, and I'm excited to be using some stashed fabrics.

BAMS March Blocks

I also finished two of my March bee blocks. These blocks are my first for the Bee a Modern Swapper group. We used a Freshly Pieced tutorial for Mosaic Blocks. This color combination is definitely popular right now. My group for do.Good Stitches is using a similar palette this month.

WIP: HMQG Charity Quilt

The Houston Modern Quilt Guild is making charity quilts this month using (mostly) fabric donations. I finished quilting this over the weekend, and just need to apply binding. We expect to finish at least twenty quilts before April.

Sometime around Christmas, Rachel and I were chatting about dishcloths, and she was shocked when I said I'd never knitted a dishcloth. I guess I skipped that step when I was learning to knit. So I ought some Knit Picks Dishie, and got down to business.

WIPs: Ballband Washcloth

I'm using the tried and true Mason-Dixon Ballband pattern. Just a few rows here and there, mostly at night when I'm winding down, but I'll have a finished washcloth soon!

Linking up with Megan!

{Sew} Modern Monday at Canoe Ridge Creations

Thursday, March 15, 2012

Knot a Problem

You may have noticed, but I didn't get very far in that photo-a-day challenge last month. In fact, I got exactly eleven days in, and some of those were taken late! Total fail.
It was fun, though, and something super awesome resulted from the challenge.

Feb 8: Challenging

My February 8th photo was of an abandoned knitting project.

Olias

My sweet kitty Olias had a not-so-sweet freakout back in April of 2010, and destroyed this WIP. I was furious. I had to cut the yarn in several places, because he had strewn it all over the house. I vented here, if you'd like to read more.

The story has a happy ending, though, and it's all thanks to the photo challenge!

Celtic Cast On commented on the photo and let me know about a ravelry group called Knot a Problem.
Basically, members of this group love to untangle yarn/projects. Seriously!

I contacted a member of the group who lives in Austin, Ana (aka Badgersmama), and she agreed to sort out the mess Olias made.
I mailed her the project and a return stamped envelope, and she returned the yarn (in several balls, since I had to cut it in more places than I remembered!), ready to be knit again!

It was so nice of Ana to do this for me, and I'm so appreciative!

Monday, March 12, 2012

FO: Sara's Scrappy Stars

Monday already? How did that happen?
I hope you had a great weekend! I'll be sharing pictures from my weekend soon, but I wanted to start the week off with an FO. Sara has received her mini, I can share it with you. It's difficult to say how long I've know Sara, but I know her blog was one of my first to follow. She knits, spins, sews, quilts, embroiders and has cats! She's awesome. She runs the Wonky Bee, and it's given me a chance to get to know her better. She's also a talented knit designer, with several published patterns. Here's a few of my favorites.

I didn't have a specific vision when I started working on Sara's mini quilt. I sorted through my scraps, and when I found all of pieces left over from my Swoon blocks, and the Post-Sewing Summit mini I made, I instantly knew I wanted to use them in this project.

FO: Sara's Scrappy Stars

I started with the four tiny stars, and just kept building from there. I used lots of fun scraps from the stash. I still have some scraps from Swoon, but this made a big dent in them.

After finishing the top, I knew I didn't want to back it with a single piece of fabric. Instead, the scrappiness continued.

The back

I enjoyed the process of the back even more than the front, I think. Using up little bits of beloved prints, measuring here and there, and before I knew it, I had enough. I really didn't want to stop, and it's got me thinking about a future project. I would be an idiot to start another big project right now, but I'm definitely going to revisit this patchwork soon.

As for the binding, I knew I wanted some sort of pop. After auditioning several prints/colors, I landed on a favorite Anna Maria Horner Innocent Crush print. This Woodcut in Red just works.

Binding

I love the contrast it provides; the warmth it gives the other prints.

I experimented with quilting on this one. Again, I started with the small stars, fully tracing the one with the dotty background. I tried to use different stitching on different areas, and I like how it turned out.

I've said this a lot lately, but I really had trouble giving this away. Sara seemed to love it, though. So, it's worth it! Honestly, do you know what my favorite part is?

Texture

It's the crinkle.

On a roll, I'm linking up with Megan today!

{Sew} Modern Monday at Canoe Ridge Creations

Friday, March 9, 2012

Swoon #9

Swoon Block #9

I finished my ninth (otherwise known as, final) Swoon block. Despite deadlines and wedding things, I just had to take a few hours and make this last block.

I have lofty goals to finish this quilt before I get married. It's doubtful, but I'm a pretty stubborn woman.

Swoon blocks done

I haven't decided on layout, but here's a mosaic of all nine blocks. I'm very happy with the blocks, and know I'll enjoy this quilt tremendously.

Happy birthday to my fiance. I love you.
And happy Friday to us all!

Thursday, March 8, 2012

Received: From Sara and Rue

Today is my sister's birthday. Happy birthday, Jiller!

Also, thanks for your kind words on my tutorial. I was nervous about posting it, but I'm glad it's done!

I want to share two very happy packages I recently received. One, handspun yarn from Rue, in exchange for the mini quilt I made Tadpole.

Handspun from Rue

Rue is such an even spinner, and the yarn is so soft! I have misplaced the card with yardage and fiber content, but I'm sure I'll find it as I pack away my room. Rue also sent along some local treats, which have been (almost) devoured. She sent some incredible espresso shortbread and a chocolate bacon bar. Yeah, I said it. BACON. And it was delicious.

Thanks again, Rue! It was so fun swapping with you!

Two, from Sara, a mini quilt and a pillow cover.

Selvage pillow from Sara

She used selvages to make this pillow cover, and look at her quilting! It's so beautiful. This was a bonus gift (!) to say congratulations to Elliott and I. Elliott actually liked this pillow better than the mini quilt, so I know he won't mind if this gets planted on our couch!

Scrappy mini from Sara

As for the mini, well, the scrappiness is out of control awesome. I love it so, and the fact that she used so many teeny tiny pieces and abandoned blocks (based on Chawne's very cool method) just makes it all the more special. Sara entered Jennifer's Modern Mini Challenge. I've got my fingers crossed for her!

Thanks again, Sara! Your package should be arriving any day!

Wednesday, March 7, 2012

Tutorial: iPad Pouch

I'm so excited to share my first sewing tutorial with you today!
Thanks to 
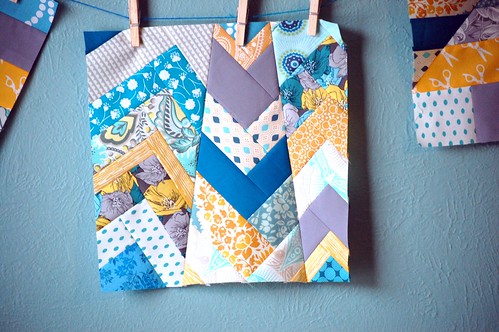
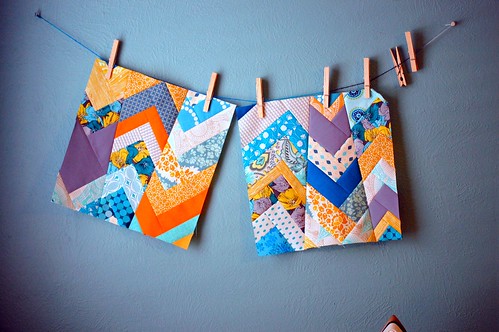
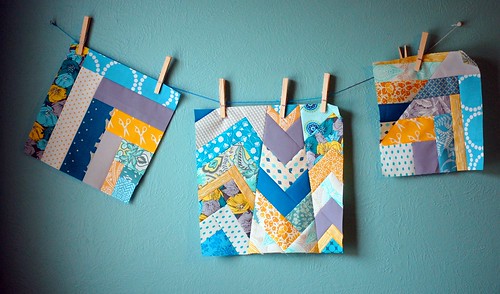
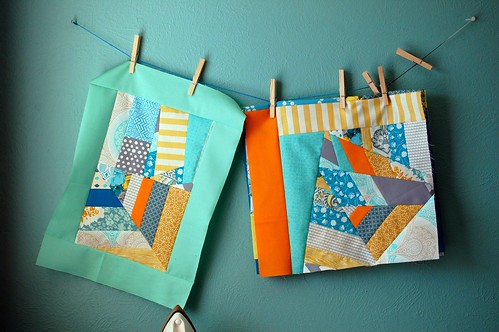
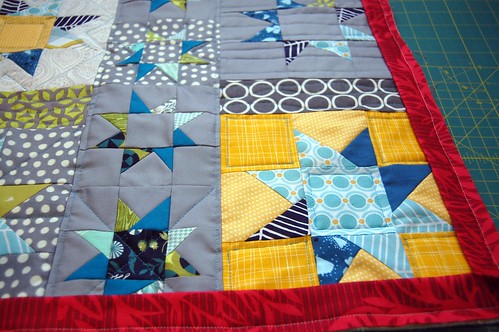
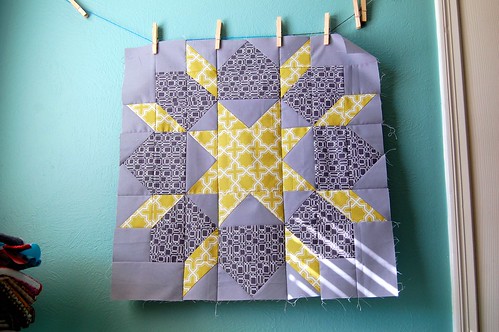
Fat Quarterly, I got to participate in a challenge using the lovely Quilt Blocks line, by Ellen Luckett Baker.

I've been wanting to make myself an iPad pouch. I made one last year, but I wanted to try a pouch with an off-center zipper. I also wanted a strap, so I can carry it around, or hang it up when I'm not using it.

Materials:

-Two 10" x 11.5" pieces of fabric (exterior)
-Two 10" x 11.5" pieces of fabric (interior)
-Two 11" x 12" pieces of batting
-One 12" zipper
-3" wide scraps OR one 3" x 13" piece of fabric (strap)

Instructions:

1) Prepare exterior pieces: Pin one exterior piece to one piece of batting and quilt as desired. I chose to quilt with a few random straight lines. Repeat with second exterior piece. Trim batting to size of exterior pieces.

2) Make strap: If you are making the scrappy version, sew scraps together to make an approximately 3" x 13" piece of fabric.

Fold the strap in half with right sides together (long sides) and sew down the side. Turn strap inside out. You should now see the right side.

Top stitch all edges of the strap.

3) Attach zipper: Make a sandwich using one exterior piece, one interior piece and the zipper. Place exterior piece right side up, line the zipper (face down) up along the edge, and lay the lining piece right side down on top. Pin along the edge, and sew three layers together. When you get to the zipper pull, be sure to unzip or zip to move it out of your way.

Flip wrong side together, and press at zipper. Top stitch along zipper line.

Repeat this process with second exterior/interior piece and other side of zipper. The side already finished should be sandwiched in between the second exterior/interior pieces. Exterior pieces should be facing each other. Sew second side of zipper.


Press and top stitch second side.

4) Sew bottom together: Now, lay the pouch out as follows. The zipper in the middle, with exterior pieces on one side (right sides together) and lining pieces (right sides together) on the other. Sew along the bottom of the exterior pieces edge, with a 1/4 seam allowance. Sew along the bottom of the lining pieces edge with a 3/8" seam allowance.
Do not sew along the sides of the pouch yet!

5) Sew sides: Turn pouch inside out and lay flat with zipper off-center. Your right sides should now be facing each other. Unzip the zipper to at least halfway.

Fold strap in half and insert raw edges (at least 1/2") between the exterior and interior layers on the edge that the zipper will lie against. The folded edge of the strap should be folded into the exterior side (see picture above). Pin strap in place.
Now sew both sides with 3/8" seam allowance. Be sure that your seams sew through the zipper teeth.

6) Finishing: Since the side seams will be exposed, trim side seams to 1/4". Because of the batting, you will barely see them on the inside. Now pull pouch right side out and lay flat. Press if necessary.

And you're done!
I hope that this tutorial was easy to understand, but please comment or email me if you have any problems!

Thanks again to Fat Quarterly for including me on this fun challenge! I will definitely be buying some Quilt Blocks fabric when it hits stores next month!

Monday, March 5, 2012

FO: Foxy Pouches

Sometimes, a task that should only take you a few hours gets postponed. For months. And months.

Julie and I were chatting sometime last fall (around October, I think?), and I offered to make her a pouch from this fox fabric. You may remember my boasty talk of making pajama pants for myself in time for Sewing Summit. Well, the pajama pants didn't happen, because this lovely organic Monoluna Anika print is not as wide as typical quilting cotton, and I didn't purchase enough to make full-length pajamas. I'm still thinking of making some shorter PJ pants, or maybe adding some patchwork to the legs. For now, I can say that I finally fulfilled my promise to Julie and made her not one, but TWO pouches.

FO: Foxy Pouches

Since it literally took me an hour to do them, I decided she deserved a bonus pouch for her patience. I'm so in love with this print.

Interior print

I found a fun coordinating floral in the stash, which I think I purchased at Joann's. I also used zippers from the stash, and added a little loop on one of them, just for fun.

It's nice when you can fulfill a promise so easily, even it takes you four months.

I'm linking up with Megan today!

{Sew} Modern Monday at Canoe Ridge Creations

Related Posts with Thumbnails